
Installing Fixing Kits
|
Equipment Required |
Safety Gear Required |
|
|
|
Step 1: Marking Out |
The location of the holes need to be marked out on the foundation before commencing drilling. There is a natural creep in the blocks during installation which needs to be taken into account when measuring and marking the location of the starter bar holes. |
||||||||||||||||||||||||||||||
|
Straight Wall |
Referring to the design supplied by the sales/design team – use the marking out stick and chalk string line to mark out the positions of the holes to be drilled. The holes should be a minimum of 300mm from the nearest edge of the foundation. Mark out 25 to 30 holes for RB12 bar unless the design has another wall T-junction in which case when you get to the T-junction mark down to the intersection (see diagram). At this point recalibrate your measuring to ensure accuracy. For larger diameter Reid bar the location of the holes needs to be more precise – if it’s a straight line, only mark out a maximum of 20 holes before fitting starters and recalibrating measurements. |
||||||||||||||||||||||||||||||
|
Corner Wall |
|||||||||||||||||||||||||||||||
|
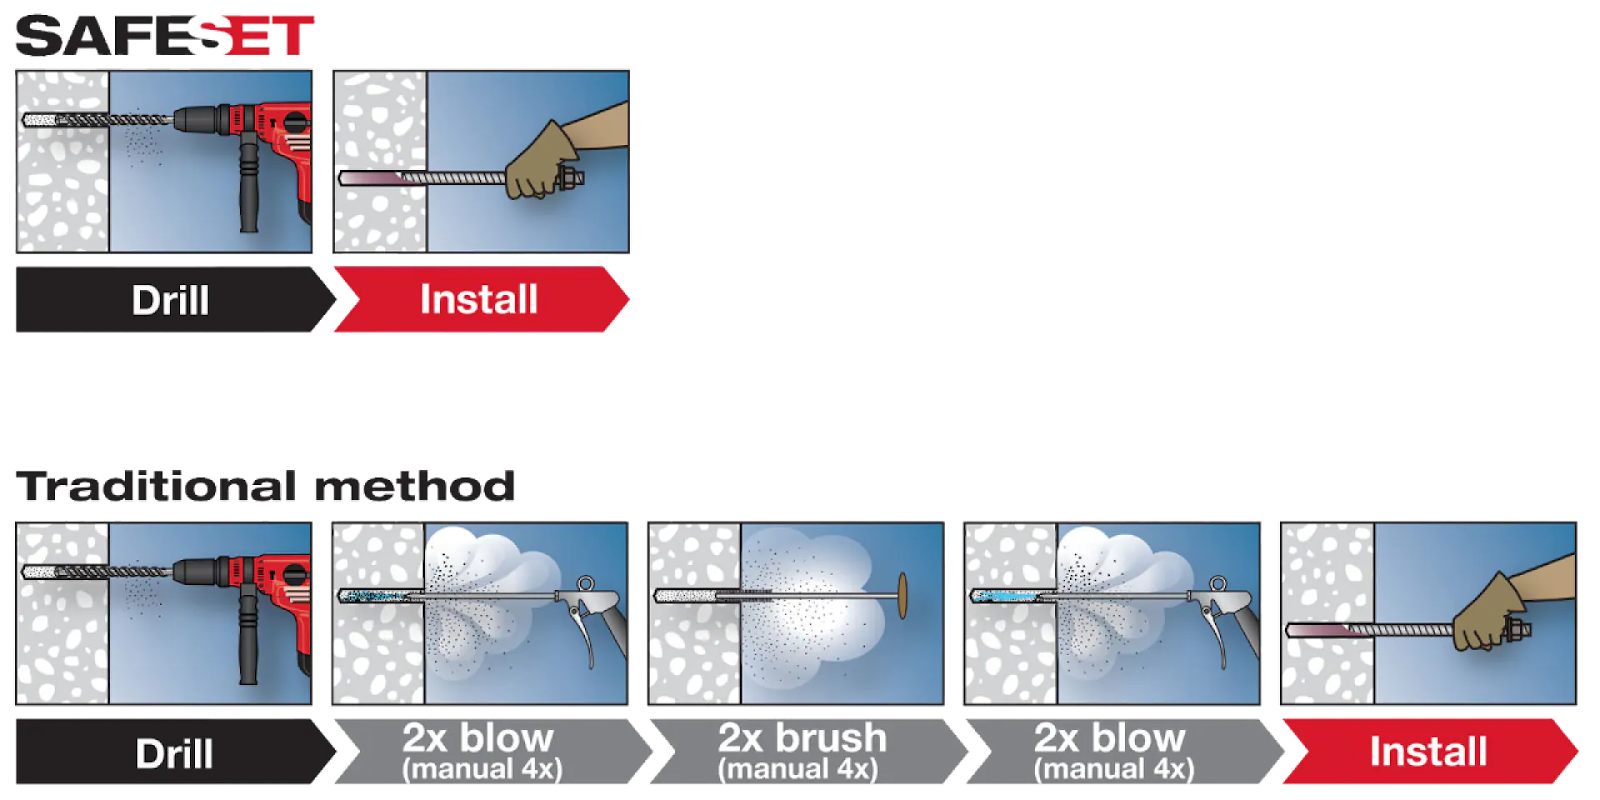
2. Drilling Holes |
|||||||||||||||||||||||||||||||
|
|
|||||||||||||||||||||||||||||||
|
|||||||||||||||||||||||||||||||
|
Indicative embedment table for standard fixing kits.
|
|||||||||||||||||||||||||||||||
|
3. Applying Epoxy and Installing Start Bars |
|||||||||||||||||||||||||||||||
|
|
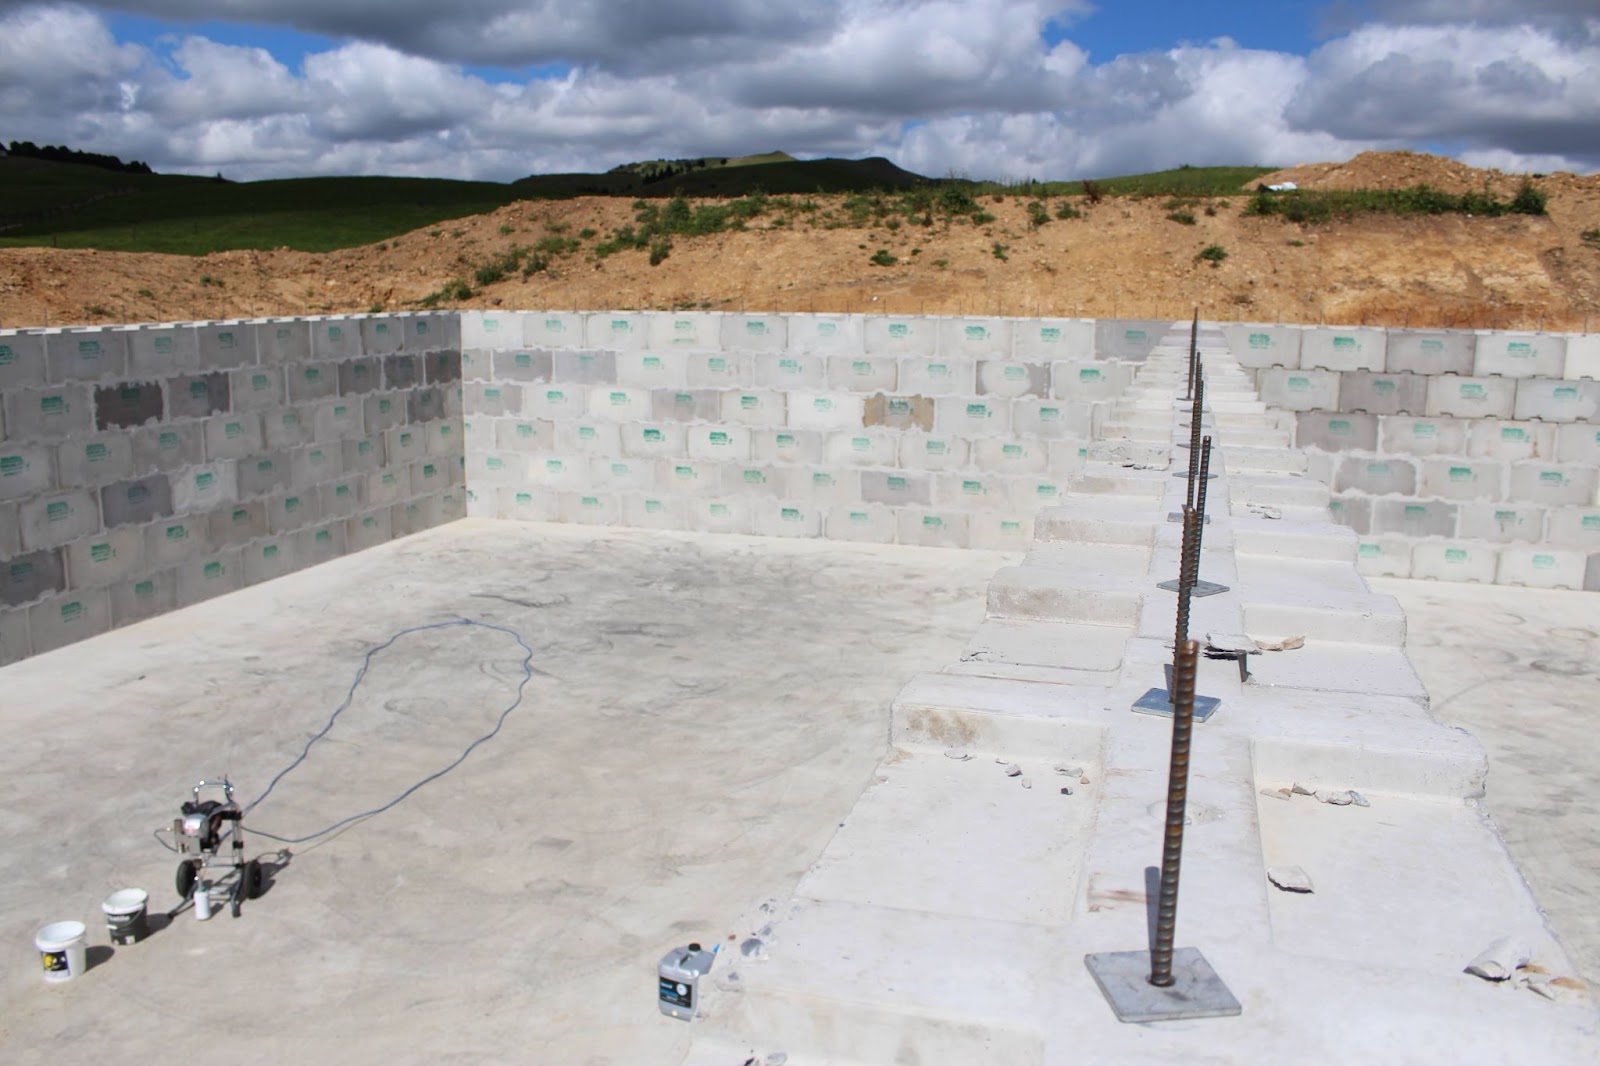
Take specified epoxy adhesive and load into the cartridge dispenser. You will require a long adapter nozzle. Insert the nozzle into the hole and fill with the required amount of epoxy. Note: If the epoxy mixes with the chemical adhesive in the nozzle ensure a uniform colour in the nozzle is achieved prior to filling the hole as this indicates the mixing has occurred. Insert the start rod into the hole slowly with a twisting motion. This ensures the product fills all the voids and crevices and uniformly coats the rod. Hilti HY – 200 has a curing time of 30 minutes. Hit-500 has a curing time of 12 hours Attach a coupler to the end of the starter bar before moving to the next hole. Safety Note: Starter bars should have high visibility safety protective caps inserted on end of the protruding starter bar. |
||||||||||||||||||||||||||||||
|
4. Wall Construction |
Refer to the relevant section of this manual. |
||||||||||||||||||||||||||||||
|
5. Installing the Mainbar |
|||||||||||||||||||||||||||||||
|
|
Once the wall is completed, Take the remaining length of rebar and fit the pair of vice grips to one end approx. 100mm from the end. Lower the rod down from the top of the wall. Note: Working at height Safety procedure must be followed Locate the rod into the coupler Using the vice grips, screw the bar into the coupler located on the top of the starter bar until it’s about 80% engaged. Fit the washers/nuts for all the rods on the entire wall. No pre-op checks are required when tensioning the fixing kits. Of the two nuts you will be applying, make sure the first nut fits to the Reid bar properly. Then position the tensioning tool over the rod of the U-block in the tensioner. |
||||||||||||||||||||||||||||||

Standard fixing kits will require tensioning post installation. Tensioning ensures the vertical reinforcing is working to stabilise the wall. The design engineer should specific the tension required on the bar.
Three months following installation the bars should be re-tensioned.